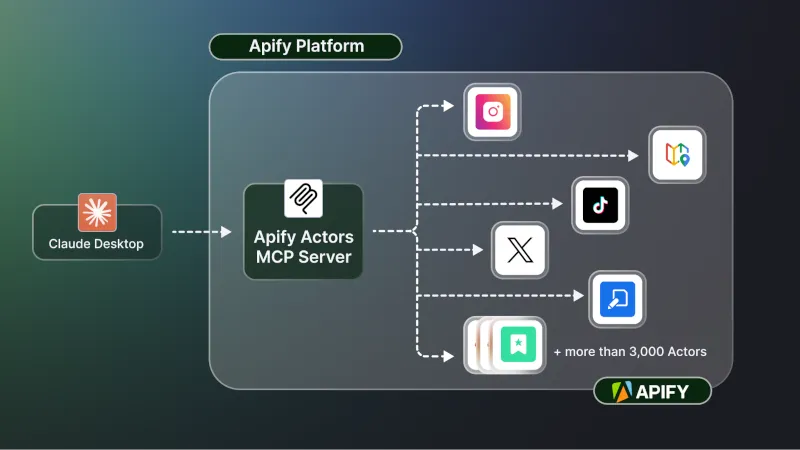
Apify MCP server
The Apify Model Context Protocol (MCP) Server allows AI applications to connect to Apify’s extensive library of Actors as tools to perform web scraping, data extraction, or other automation tasks in real time.
Quickstart
You can use the Apify MCP Server in two ways:
- Standard Input/Output (stdio): Ideal for local integrations and command-line tools such as the Claude desktop client.
- Set MCP client server command to
npx @apify/actors-mcp-serverand environment variableAPIFY_TOKENto your Apify API token - See
npx @apify/actors-mcp-server --helpfor more options
- Set MCP client server command to
- HTTPS Endpoint mcp.apify.com: Connect your MCP client by including
Authorization: Bearer <APIFY_TOKEN>header in your requests.https://mcp.apify.comfor streamable transporthttps://mcp.apify.com/ssefor legacy SSE transport
You could also use legacy option by running Apify Actors MCP Server as an Actor.
Prerequisites
Before you start, make sure you have the following:
- An Apify account: Sign up for a free Apify account if you don’t have one.
- Apify API Token: Get your personal API token from the Integrations section in Apify Console. This token will be used to authorize the MCP server to run Actors on your behalf.
- MCP client: An AI agent or client that supports MCP. This could be Anthropic Claude desktop, a VS Code extension with MCP support, Apify’s web-based Tester MCP Client, or any custom client implementation. See supported MCP clients in official documentation.
Example usage (local stdio with Claude desktop)
Let’s walk through an example of using Claude desktop with the Apify MCP Server:
-
Configure Claude desktop: Claude desktop supports MCP servers via the Developer settings. You need to add an entry for the Apify MCP server. For instance, in Claude’s config file, under
mcpServers, add an entry like:{
"mcpServers": {
"actors-mcp-server": {
"command": "npx",
"args": ["-y", "@apify/actors-mcp-server"],
"env": {
"APIFY_TOKEN": "YOUR_APIFY_TOKEN"
}
}
}
}This tells Claude to spawn the Apify MCP Server (via the Actors MCP Server NPM package with your API token (on the first run, it will download the package automatically).
-
Launch Claude and connect: After updating the config, restart Claude desktop. If successful, Claude will show a “plugin” (often indicated by a plug icon 🔌) signifying it connected to the Apify Actors MCP server.
-
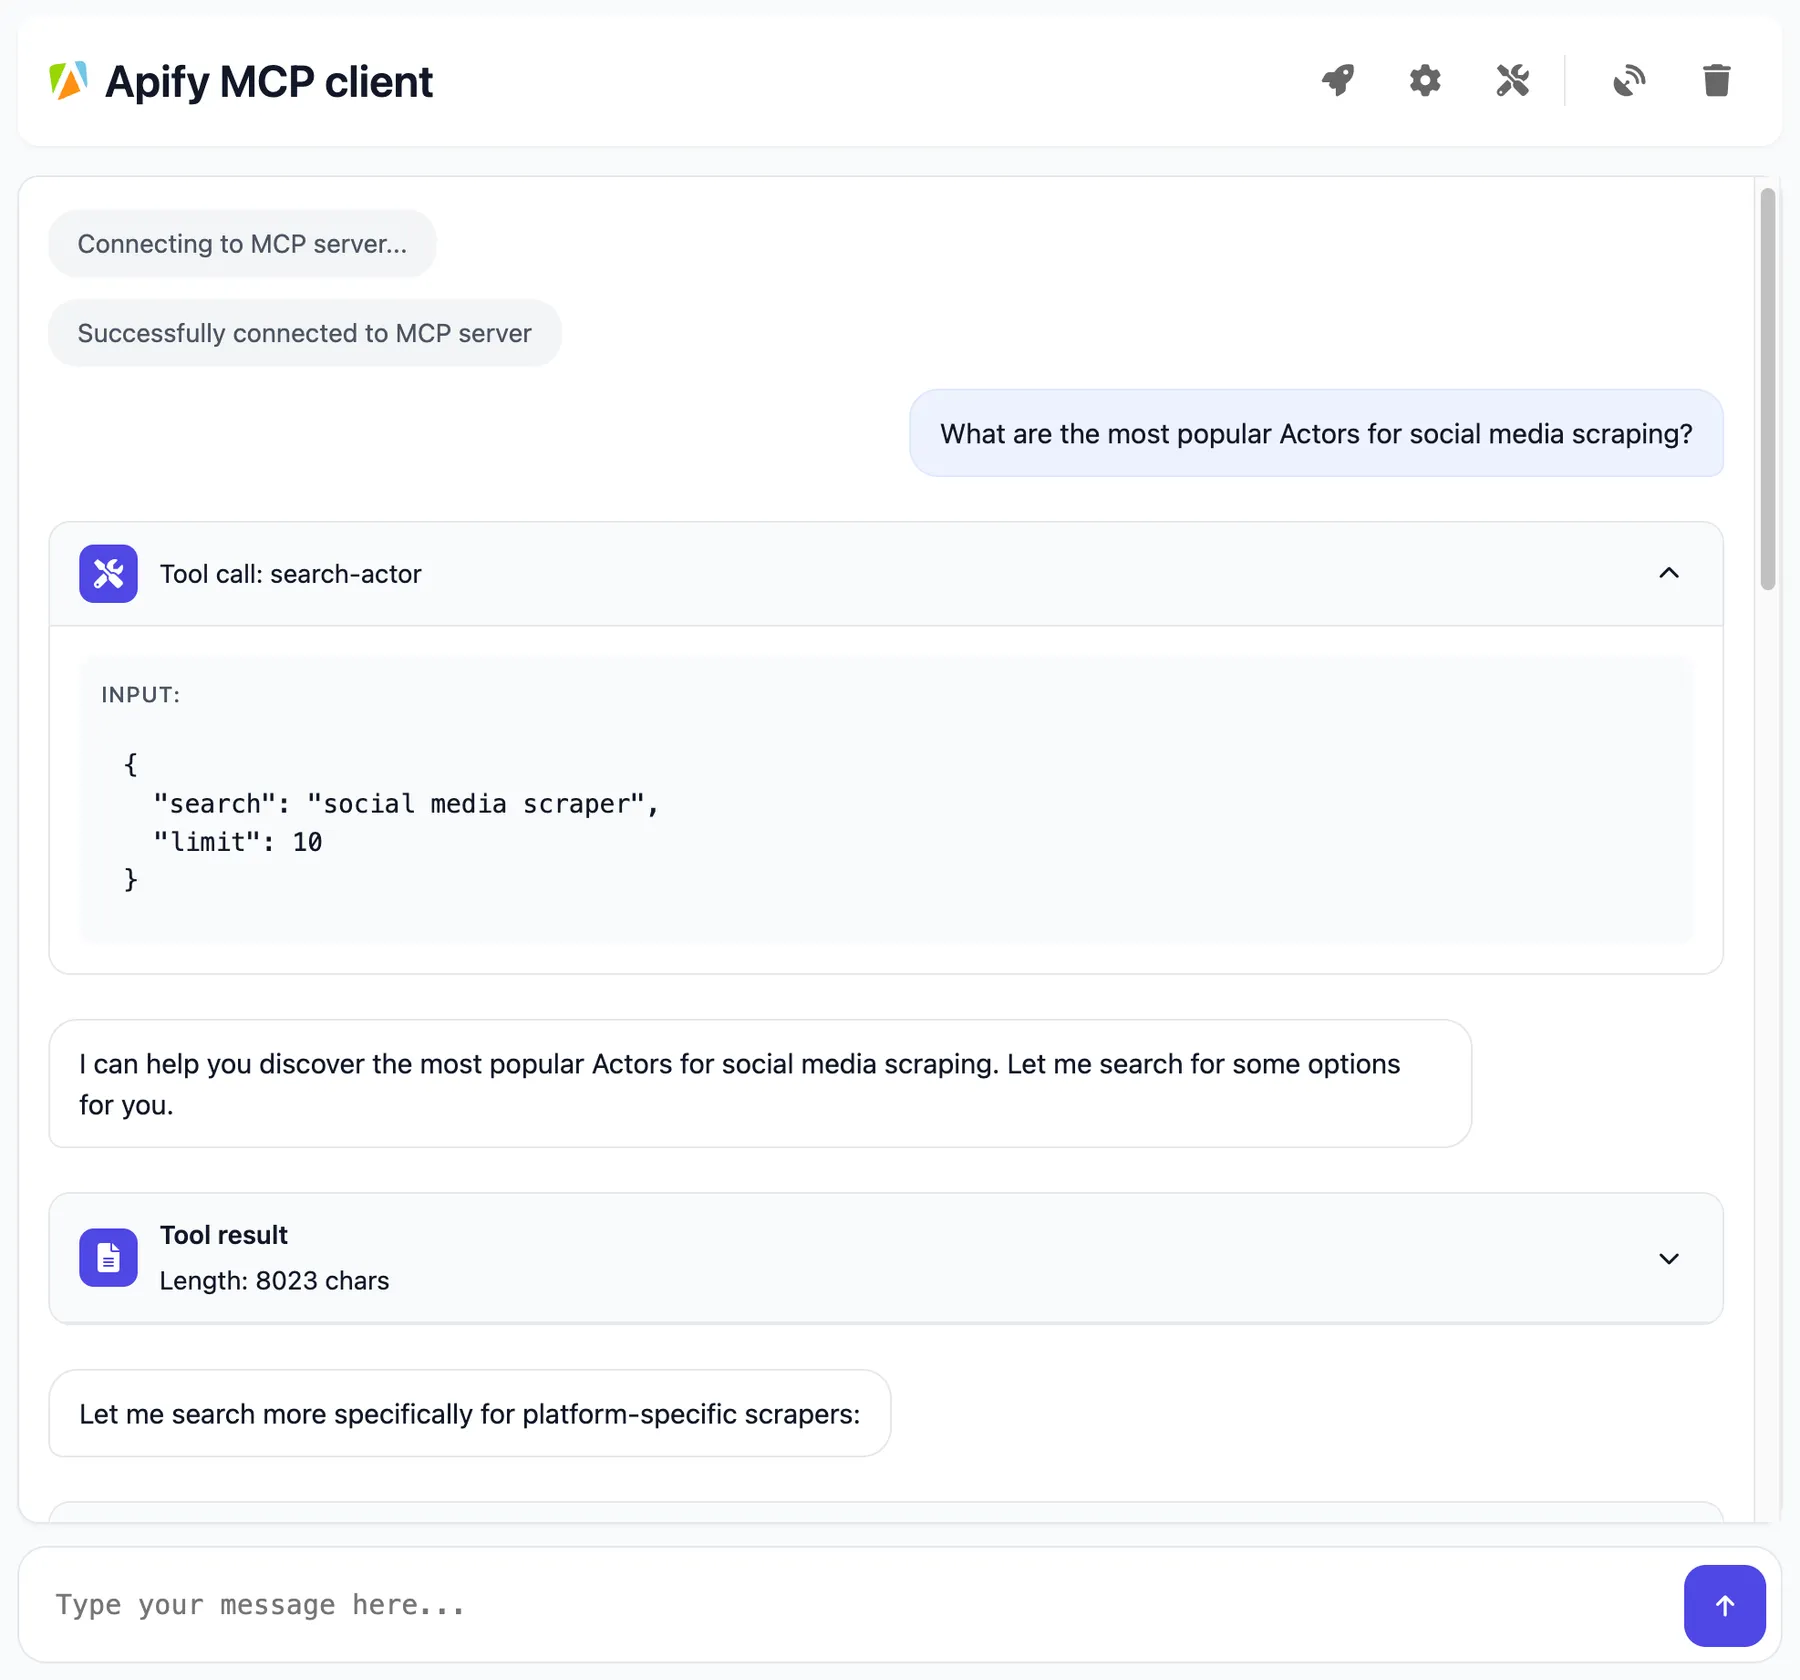
Use the Actors in conversation: You can chat with Claude and ask it to use Apify Actors. For example: “What Apify Actors can I use?” Claude will list available tools via the MCP server. If none are pre-loaded, it may show defaults or guide you to find more.
(If you prefer not to set up Claude desktop, you can achieve a similar result using Apify’s Tester MCP Client, which provides a web UI to test the MCP server.)
Interact with the MCP server over SSE
You can interact with the server through Server-Sent Events (SSE) to send messages and receive responses.
In the client settings, you need to provide server configuration:
{
    "mcpServers": {
        "apify": {
            "type": "sse",
            "url": "https://mcp.apify.com/sse",
            "headers": {
                "Authorization": "Bearer your-apify-token"
            }
        }
    }
}
Adding Multiple Actors
By default, the main Actors MCP Server starts with a single default RAG Web Browser Actor. However, you can fully customize which Actors are available:
- Dynamic adding during a session: If your client supports it, the agent itself can add Actors dynamically by name (using the
add-actoroperation) at runtime. For example, after usingsearch-actorsto find an Actor’s name, callingadd-actorwith that name will load it. Note that not all MCP client frameworks allow dynamic tool addition at runtime, but Apify’s own tester client does, ifenableAddingActorsis enabled—either via?enableAddingActors=truein the MCP Server URL, or with the CLI flag--enable-adding-actors(can also be set in Claude Desktop config args as--enable-adding-actors). - Via config file (for Claude desktop): When using Claude desktop, you can specify which Actors should be immediately available by configuring your
mcpServerssettings. Add the Actors as a comma-separated list in the--actorsparameter, as shown in the example below. This pre-loads your selected tools without requiring discovery during conversations, ideal for workflows with predictable tool needs.
   {
    "mcpServers": {
      "actors-mcp-server": {
        "command": "npx",
        "args": [
          "-y", "@apify/actors-mcp-server",
          "--actors", "lukaskrivka/google-maps-with-contact-details,apify/instagram-scraper"
        ],
        "env": {
           "APIFY_TOKEN": "YOUR_APIFY_TOKEN"
        }
      }
    }
   }
In summary, you can start with a broad set (everything open and discoverable) or a narrow set (just what you need) and even expand tools on the fly, giving your agent a lot of flexibility without overwhelming it initially.
Dynamic Actor tooling
One of the powerful features of MCP with Apify is dynamic actor tooling – the ability for an AI agent to find new tools (Actors) as needed and incorporate them. Here are some special MCP operations and how Apify MCP Server supports them:
- Actor discovery and management: Search for Actors (
search-actors), view details (get-actor-details), and dynamically add or remove tools (add-actor,remove-actor). - Actor execution and monitoring: Start Actor runs, fetch run results (
get-actor-run), logs (get-actor-log), and abort runs (abort-actor-run). - Dataset access: List datasets, retrieve dataset info and items (
get-dataset,get-dataset-list,get-dataset-items). - Key-value store access: List key-value stores, view keys, and retrieve records (
get-key-value-store-list,get-key-value-store,get-key-value-store-keys,get-key-value-store-record). - Built-in help tool: A static helper (
apify-actor-help-tool) that returns usage info for the Apify MCP Server.
Troubleshooting
- Authorization (API Token): If the MCP server isn’t executing Actors, ensure you provided a correct Apify API token. Without a valid
APIFY_TOKEN, the server cannot start Actor runs. Always set theAPIFY_TOKENenvironment variable when running locally. - Ensure latest version: If running via NPM, always use the latest version of
@apify/actors-mcp-serverfor the newest features and fixes. You can append@latestwhen installing or in your config args to ensure this. - Node.js environment: If running the server locally, make sure Node.js is installed and up to date (
node -v). The MCP server requires Node.js v18+. - No response or long delay: Keep in mind that when an Actor tool is called, it may take some time to complete (depending on the task). If nothing is coming back, check the Actor’s logs in Apify console — the Actor might be waiting on a long operation or input.
Learn more
- Model Context Protocol (MCP): Learn about the open standard on the official MCP website – understanding the protocol can help you build custom agents.
- Apify Actors MCP Server: The README for the Apify MCP Server actor (available on Apify Store as
apify/actors-mcp-server) provides technical details on implementation and advanced usage. - Apify Tester MCP Client: A specialized client actor (
jiri.spilka/tester-mcp-client) that you can run to simulate an AI agent in your browser. Useful for testing your setup with a chat UI. - How to use MCP with Apify Actors: Learn how to expose over 5,000 Apify Actors to AI agents with Claude and LangGraph, and configure MCP clients and servers.